Friday, 24 May 2013

Muesli and banana sourdough

This recipe is taken from Paul Hollywood's book, "How to bake". The first time I made it I had no sourdough starter, and so used instant yeast. The bread was dense and a bit heavy, but OK. This time I used sourdough starter, but instead of following Paul Hollywood's method of kneading for 10 minutes, letting it rise before knocking back and letting it rise a second time, I used the stretching and folding method. I have halved the recipe from his book:
  • 375g strong white flour
  • 250g starter
  • 7.5g salt
  • 1 and half bananas
  • 150g muesli
  • 225g water
Despite an extra stretching and folding the dough never really got stretchy. It was also less wet than a normal plain sourdough dough. I divided it into two small balls and managed to shape them using flour and put them into bowls with flour at the bottom.

Paul Hollywood's original recipe states that the loaves should be proved for around 13 hours. I baked one loaf after 6 hours of proving. It hadn't grown much in the bowl. I started off with a medium oven temperature of 180 degrees C fan, but after 40 minutes it had no colour on it so I increased the temperature and the time. The finished loaf was quite small and heavy.

I left the other loaf to prove overnight (meaning it had 15 hours of proving). I was surprised to see that it had grown to quite a good size in the bowl. However, it did not rise any more during baking.

Comparing slices from the loaves, the one at the top is from the 6 hour proved loaf, the one at the bottom proved for 15 hours. Whilst both are heavy, and a bit rubbery, the longer proved loaf has a more "grown up" texture.

I think this loaf might be better as an instant yeast recipe, rather than a sourdough one. My sourdoughs all seem to be quite moist, I often think I should have baked them more.

It might be an idea to actually follow his recipe! Neither of the two versions I have made, have been as good as the one made to his recipe that I bought in Waitrose, which is a surprise as bread bought from a supermarket wrapped in plastic is usually not very good.

Granary sourdough

This time, I wanted to find out two things:
  • Is it possible to make a granary sourdough loaf?
  • What happens to sourdough when you bake a loaf in a traditional loaf tin?

I adapted Dan Lepard's recipe for white leaven bread, replacing the strong white flour with granary flour:
  • 200g white leaven
  • 325g water
  • 500g granary flour
  • 1.5 tsp salt

I carried out the usual method of stretching and folding at regular intervals (see earlier post for timings).

After a few hours I noticed that the dough was not as stretchy as the usual white leaven dough.

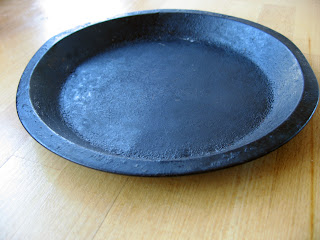
To let the dough rise, I divided it into two. One I put on my usual flat round baking tray with a lip, also using baking parchment on the bottom. For the other, I put the dough in a traditional baking tin, with a rectangle of baking parchment at the bottom. After 5 hours both doughs had only risen by about a half, compared to the white dough.

I baked them at a slightly lower temperature than I would normally, as I guessed that the flour had more sugars in from the granary flour.

The loaves did not rise a lot in the oven. The round loaf was about half the size of a normal white sourdough loaf.

The bread had a lovely crust on it and both were better (more airy) than the granary bread I made the week before, using instant yeast and kneading for 10 minutes. If I were to make granary bread again, I would definitely use this recipe and method again.

The bread baked in the traditional loaf tin had a much denser texture compared to the one baked as a round on a flatish tin. So I shall stick with baking my bread as a round on a flatish tin.

The finished loaves may have been denser because the extra bits in the dough (eg grains) made it heavier and harder to rise. I also wondered if my natural white leaven yeast did not like feeding on granary flour and whether that had made a difference to the rise.

The granary flour produced a heavier loaf than the white flour, but yes, I found out it is possible to make a granary sourdough loaf.

NB Granary flour is a trademarked flour by Hovis, and includes malted cracked grains. When baked it turns brown from the added malt, a sugar, rather than because the flour is wholemeal. Today I found Allison's bread flours which I shall try next time: Wholemeal Seed & Grain Bread Flour and Seed & Grain Bread Flour which don't have malt in. They also make Country Grain Bread Flour, which appears to contain malt.


Sourdough english muffins

I got this recipe from the American King Arthur website, which helpfully provides measurements in grams and ounces. The recipe makes 12:
  • 12.5g sugar
  • 225g water
  • 1/2 tablespoon of instant yeast
  • 120g sourdough starter
  • 420g strong white flour
  • 22g powdered milk
  • 25g soft butter
  • 1/2 tablespoon of salt
  • Semolina for coating
 
I have made these once before and this time decided to try the recipe without sugar, and to use the stretching and folding technique rather than traditional kneading. Unfortunately I forgot the milk had to be powdered and used liquid milk, meaning I had added a little too much liquid. The dough was a little bit more sticky than it should have been. What is great about these is that they are cooked on the stove top, rather than in the oven.

  1. Combine the ingredients except the semolina, into a large bowl.
  2. Mix and Knead until soft and elastic (I stretched and folded around 3 - 4 times until it seemed right)
  3. Place the dough in a lightly oiled bowl and cover, let it rise for 1.5 hours or until puffy.
  4. Gently deflate the dough and divide into 12 roughly equal pieces
  5. Roll them into balls and gently squash flat, coating them with semolina.
  6. Place them on a tray or plate, cover and let them rise until light and puffy, around 45 to 60 minutes.
  7. Gently transfer the rounds onto a non stick ungreased frying pan that has been preheated over a medium heat, to around 180 degrees celsius.
  8. Cook them for about 10 to 12 minutes on each side.

I don't have a thermometer so once the frying pan is hot I turn it down to the minimum and put a lid on the frying pan with a gap to allow steam to escape. The first time I burned a few. This time they seemed a little too moist in the middle. I used a skewer to test whether the inside was cooked or not.

      The recipe did not suffer from a lack of sugar. In retrospect I should have added more flour at the mixing stage, to make the dough less sticky. The texture seemed more crumpet-like than bread-like, which was probably due to the wetter dough.

Wednesday, 22 May 2013

stretching and folding rather than kneading

Dan Lepard suggests stretching and folding the dough, rather than kneading. This means that you can work with a much wetter dough, which I think rises easier and produces a less dense texture than traditional kneading. The stretching and folding technique is much better than traditional kneading where I get impatient with the dough, wondering when the 10 minutes is up. I also prefer the finished product - more holes and a less regular crumb. It does however mean that you are tied to the house for a few hours. This is an example of a stretching and folding schedule:

  • 8am mix the ingredients in the bowl
  • 8:10 tip out on to an oiled surface, and stretch and fold the dough 12 times. Clean the bowl. Leave the dough on the worksurface and cover with the bowl.
  • 8:20 Stretch and fold the dough 12 times.
  • 8:30 Stretch and fold the dough 12 times. Already you can feel a difference. Put the dough in the oiled bowl and cover.
  • 9am Tip out the dough on to an oiled worksurface and stretch and fold 12 times. Put the dough in the oiled bowl and cover.
  • 10am - same as for 9 am.
  • 11am - same as for 9 am.


At either midday or 1pm (depending on the recipe) I divide the dough into loaf sized pieces (blobs really), and put them on a circular well floured baking tray with a slight lip. Recently I have also been using baking parchment to stop the bread sticking to the tray.

I cover the dough with a mixing bowl, and leave for 4 1/2 to 5 hours, and then bake in a very hot oven for around 30 minutes - depending on the size of the loaf.

Leaven recipe

This is the starter you need to make sourdough, and takes around 7 days to make. I have adapted this from Dan Lepard's book The Handmade Loaf.

  • Day 1: Mix 50g water at 20 degrees C and two tablespoons of white bread flour, in a 500ml jar. Cover and leave at room temperature for 24 hours.
  • Day 2: Stir 50g water at 20 degrees C and two tablespoons of white bread flour into the leaven, cover and leave at room temperature for 24 hours.
  • Day 3: Throw away half of the mixture, and add two tablespoons of white bread flour and 50 g water. Shake the jar, cover and leave at room temperature for 24 hours.
  • Day 4: Throw away about half of the mixture and repeat Day 3.
  • Day 5: As day 4. Fermentation will be obvious now, and it will start to smell acidic.
  • Day 6 onwards: Take the lid off the jar and you will see the mixture bubbling. Whenever you remove some leaven, replace with an equivalent amount of flour and water. The aroma of the leaven will become sharper and more acidic. If it smells like beer, you know you have done it right.
In his recipe, Dan recommends adding raisins and yoghurt to the leaven on day 1, but as someone said to me, why introduce yeasts from those foods, when I want to be using yeasts found in the air and in the flour.
I leave the leaven in the fridge, and take it out a couple of hours before I need to use it. I only ever use half of it, which is about 100g. I then replace what I used with equal amounts of flour and water, and leave the jar out for a couple of hours or more, before putting it back in the fridge.
I use a jar with a plastic lid that doesn't fit very well. This is good because it allows some air to escape (and sometimes leaven, which is why it is always on a plate when at room temperature.

Introduction

This is where I share my experiments in baking bread, mostly sourdough. My favourite method is the stretch and fold method as explained by Dan Lepard. It requires very little kneading and is an easy way of working with wet dough. I find it hard to work with "normal" drier dough now - it feels strange. I still haven't quite worked out the shaping bit though, which is what has partially prompted this blog as I try to work through that difficulty, and others I encounter - including my search for the perfect recipes!